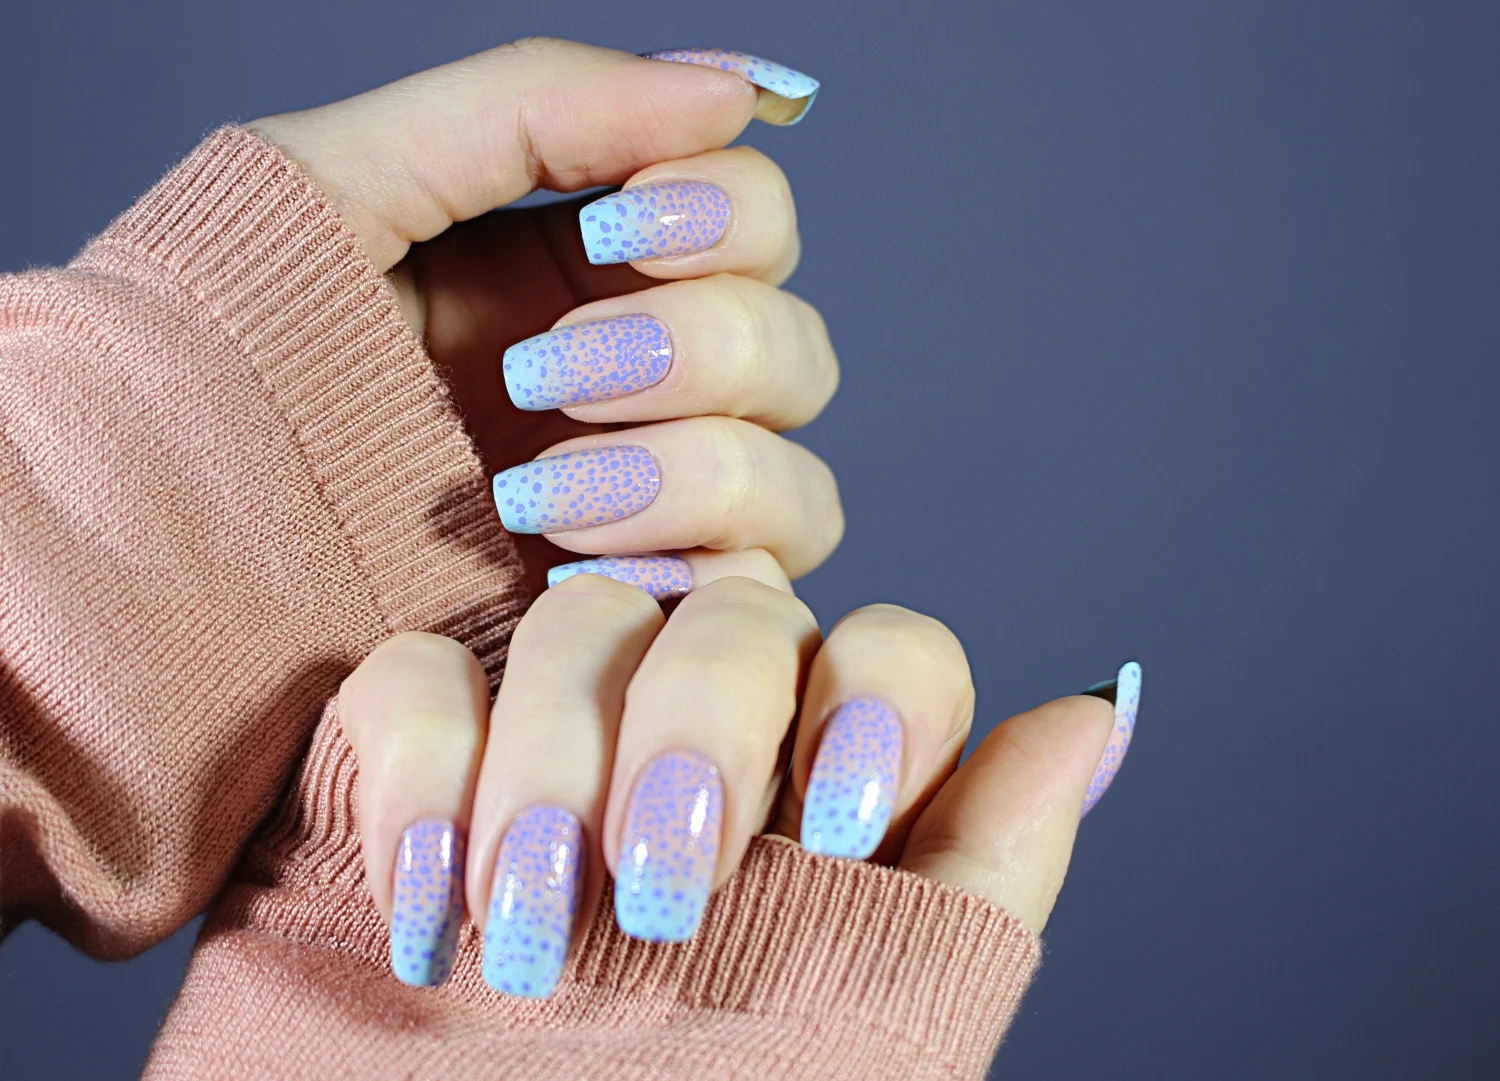
Did you know that unicorns can cry? Unicorns are legendary creatures with unique, magical powers. According to Harry Potter and the Philosopher's Stone book by J. K. Rowling, a drop of unicorn's blood can keep ones who drink it alive, but at a terrible price. Interesting, what can a drop of unicorn's tears do? Inspired by the bestiary tales and lore, surrounding these peculiar horses, I've created today's colorful manicure. Isn't it ideal for the upcoming back-to-school season?
How to Do Back-To-School Pastel Unicorn Nail Look?
For the unicorn tear manicure I used three different nail polish colors: warm-toned nude, baby-blue color from my Celestial Nails post, and, my favorite, lavender stamping nail polish called Candy Shannon* for 'garnishing'. Born Pretty stamping nail polishes have an opaque formula that allows you to get the perfect coverage and clear stamping design from the very first time.
- Step 1: Prepare your nails...
Start off with prepared nail plates: filed, polished, and de-greased (usually I wipe the nails with acetone or nail polish remover right before starting). The nail polish base goes next — it will smooth the surface of your nails and extend the longevity of the nail look. After the base proceed to the first coat of nude nail polish. If it is opaque enough, one coat will give your nails good coverage and you can continue your nail design.
Now for the hardest part – an ombré or gradient effect, which you can create with a regular makeup or kitchen sponge. The secret here is to mix the already-used nude nail polish with the baby-blue shade on the surface of the sponge and dab your nails with a damp sponge a few times. The whole technique seems a bit complicated, but it is easier to do than it sounds.
- Step 3: Use the nail stamping technique...
Let your pastel unicorn nails dry completely, meanwhile prepare the nail stamping plate and stamper. For the 'garnishing,' I used one of my favorite stamping plates by Born Pretty. Swipe the lavender color on the surface of the design and remove the excess amount of nail polish with a scraper. Transfer the dots onto the nails and voila! How cute does this unicorn nail design look! I especially appreciate the color combination.
- Step 4: Apply no smudge top coat...
The final accord of the nail symphony is a No Smudge clear top coat. Seal your pastel nails with it to smooth the transitions between colors and add shiny appeal. A matte finish will also look great with this back-to-school unicorn nail look. Sounds like too much work? With a good-quality top coat, such a nail look will last for two weeks without chipping.
Let's summarize...
That's all for today's Unicorn Tears manicure, ladies and gentlemen! I really hope this post was somehow useful to you and you'll want to recreate it one day. Would you wear this cute nail design to school? It would be a great addition to a subtle everyday back-to-school makeup look. Let me know our thoughts on this manicure in the comments!
Lots of love,
Liz


