COVID-19 and the worldwide pandemic have reached me with one convenient rule, which I thoroughly follow in my daily life: if it is practical and fast, it fits my new lifestyle. Who has time to visit a nail salon anyway? I have always preferred doing my nails myself. As a stress-relieving activity DIY manicure can substitute for a costly session of meditation, or at least save you a few coins. However, a budget-friendly at-home nail makeover can take up to an hour of your time.
But what if you could get a professional-looking nail look almost instantly? Or making your long-nail dream come true in just a blink of an eye? This sounds like an impossible mission or nothing less than black magic, doesn't it? I believe it may be possible with a set of press-on nails and just a bit of patience. Today we are going to try on five gorgeous press-on nail looks by Glamermaid and test if they are as easy to use as claimed by the brand.
What are Glamermaid Press-on Nails?
Glamermaid is a brand of press-on nails with the trendiest and the most unique designs. Its mission is to save both time and money spent on professional manicures, without sacrificing the opportunity to rock glamorous manicures. The main feature, that distinguishes Glamermaid's nails from others, is their longevity and reusability.
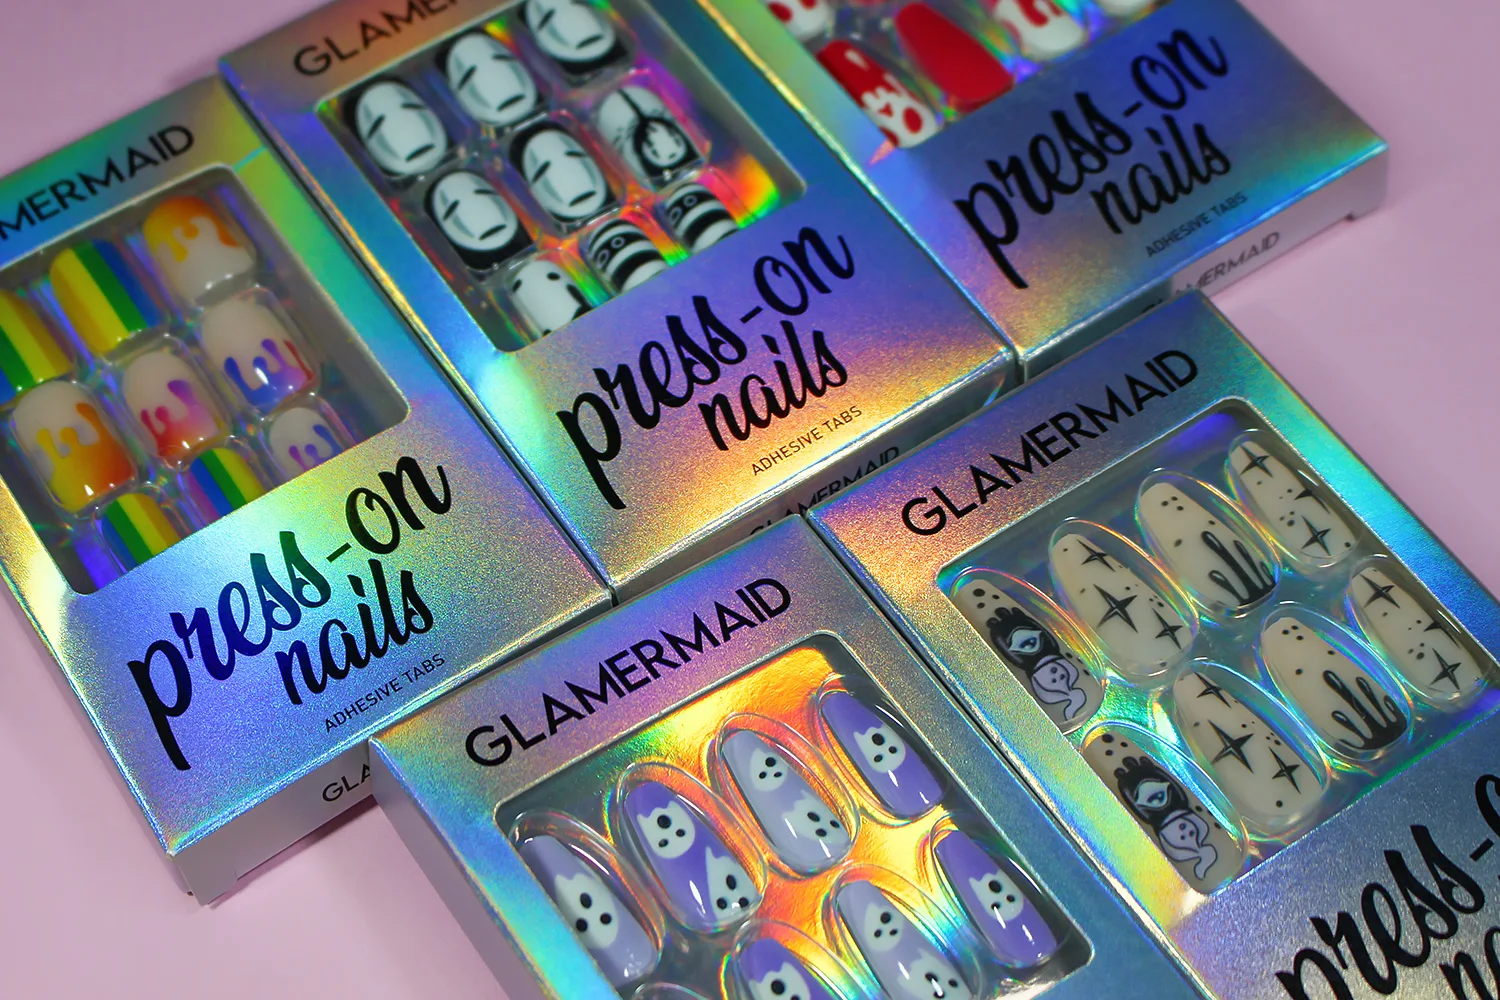
To be honest, the last time I used press-on nails was back in high school. I remember buying a set of plastic pink nails with a beautiful French manicure design and pearl-like decorations. Sadly, there was no similar design on the Glamersmaids website, instead, I found these five incredible sets:
- 1. 'Whoops Ghost'*– long, coffin shape with pastel lavender base and cure white ghost design;
- 2. 'Bloody Skull'* – long, coffin shape nails with a matte red base and poison apple skull design;
- 3. 'Flashlight Bat'* – long, coffin shape, and matte nude base, with Wiccan-inspired black and white design;
- 4. 'Rainbow Doodle'* – medium-length nails with a square shape and rainbow design on a glossy, nude base.
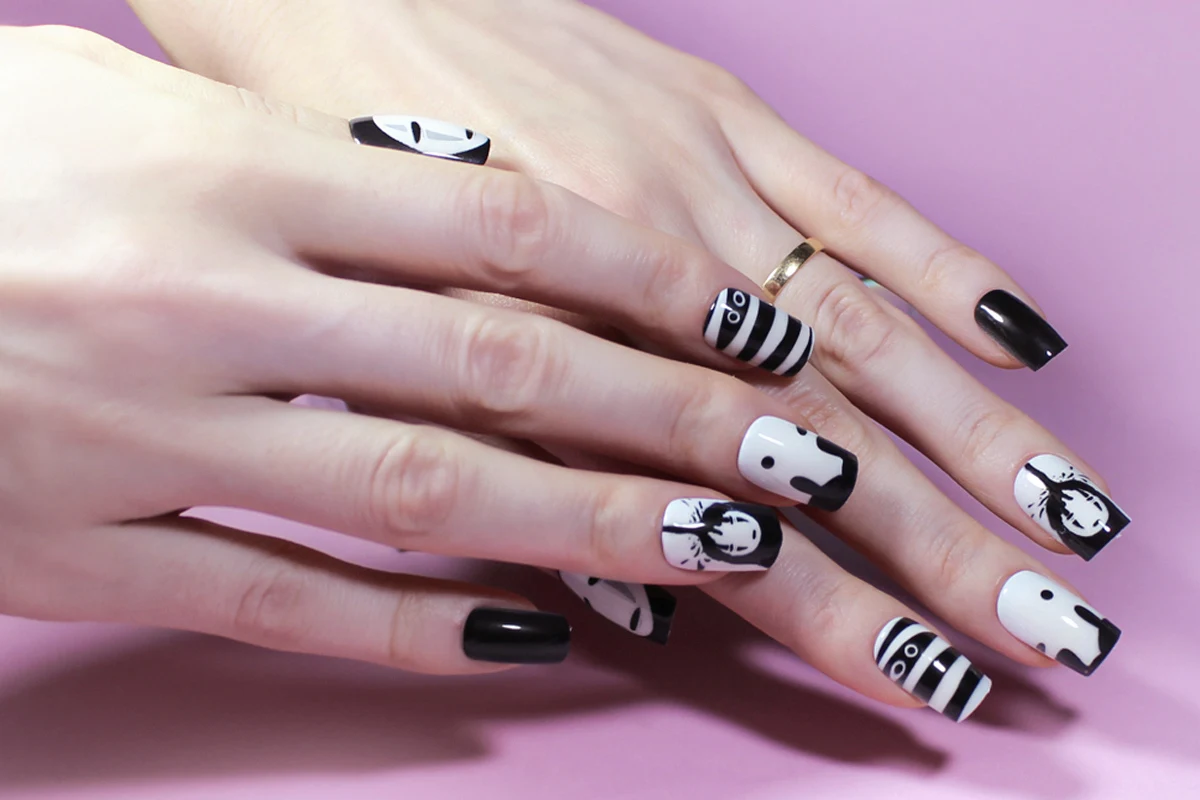
- 5. 'Ignore You'* – medium-length nails with a square shape, black and white design inspired by the No-Face character from Spirited Away.
What Will You Get?
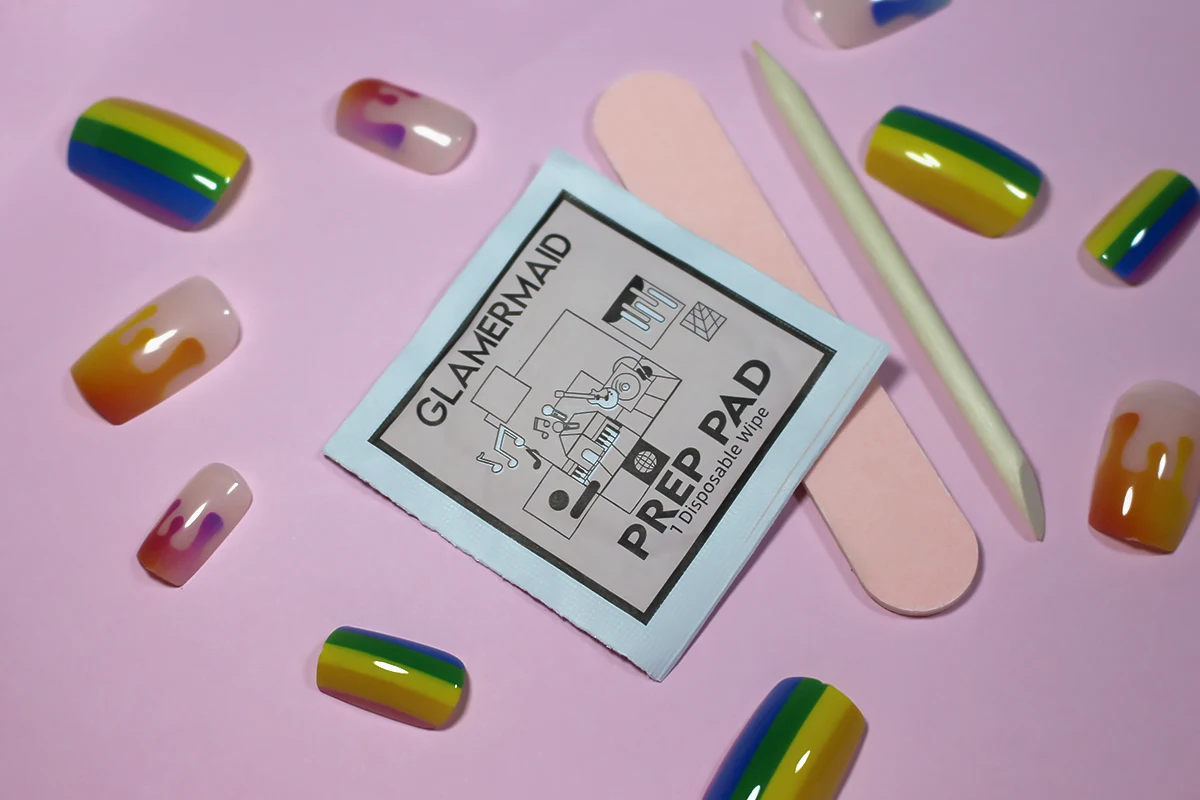
Each set of press-on nails by Glamermaid comes with 24 nails and 12 alternative sizes for your nails. You will also receive 2 sheets of nail adhesives each with 24 pieces and various sizes, an orange stick that helps to apply and remove nails, one manicure buff, and 1 alcohol-based prep wipe. That is pretty much everything you'll need to get the glamorous nail look of your dreams in no time.
The main features, which distinguish Glamermaid from other press-on nails are – the lightweight and flexible plastic material, just a bit thicker than natural nails. These nails are easy to apply and remove, below I'll show you how to do this. Glamermaid nails are waterproof! You can take a shower, and wash your hands and dishes without any fear of losing your manicure in a waste pipe. The stick-on adhesives leave little to no residue either on your natural nails or on press-on nails. That means you can keep reusing them multiple times.
- How to Apply Glamermaid Press-on Nails: Step-by-Step Instructions
1. Firstly, find the right nail size that fits the size of your nail bed the best. Each set of Glamermaid nails comes with 12 different sizes to choose from, so finding the right one won't be much of a trouble.
2. Together with the set of press-on nails you'll also receive an orange stick and a manicure nail file. Use them for your nail care routine: gently push the edges of the cuticle, removing the dead skin. And smooth the surface of your nails with the buff, to make the adhesion better. The buff is good for the initial smoothing, but you'll need to use a finer buff after it to make the surface of your nail smoother.
3. Now it is time to remove any excess moisture and oil off the nail surface. Use Prep Pad, which also comes in the set to wipe away your natural nails. Use it on each of your nails for 10-15 seconds, thoroughly removing any oil and dirt.
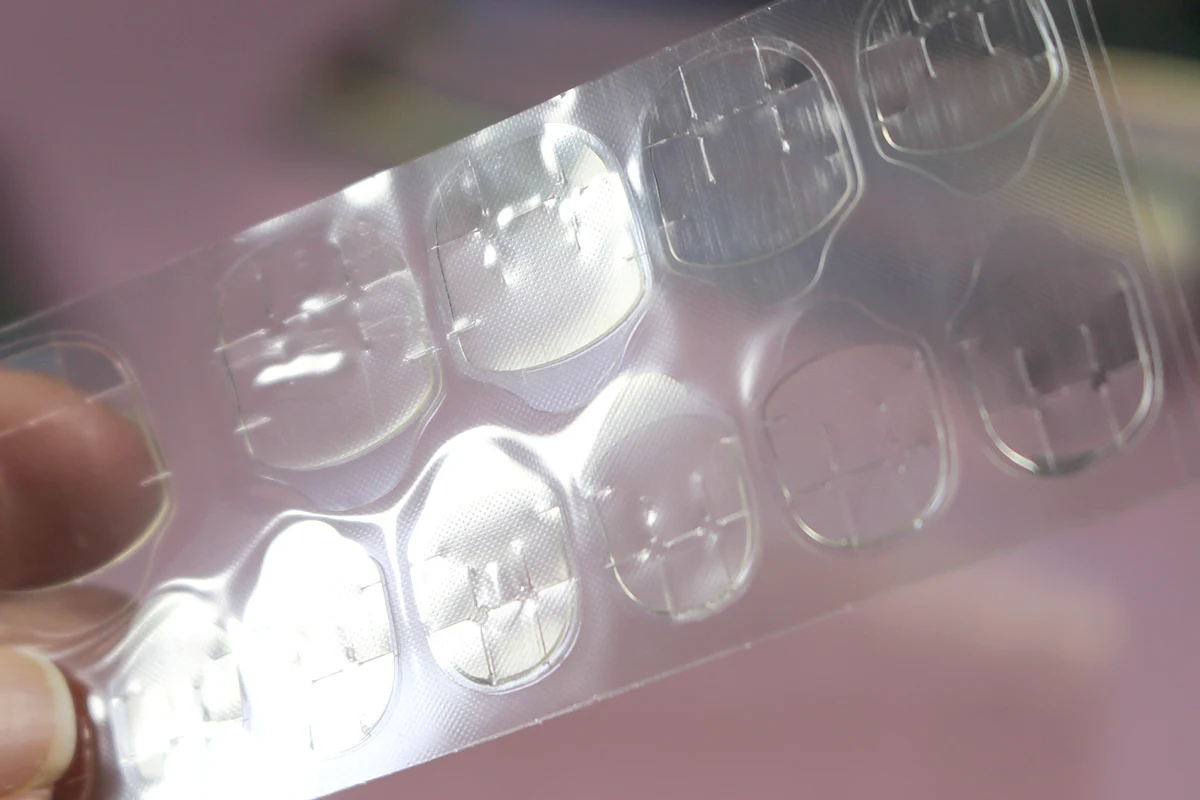
4. The nail preparation is finished, let's proceed to the 'sticky' part of the press-on nail adhesive stickers. You'll need to fit them beforehand, as they also come in different sizes. Remove the stickers from the plastic and press them against the inner part of the press-on nails.
5. Fit the press-on nail with the applying adhesive onto your natural nail, press it firmly, and hold for 15 seconds. To make your newly-acquired nail look last longer, avoid any contact with water for 2 hours after the application.
6. To take nails off, use the orange stick and gently peel them off from the sides. You can hold your fingernails in warm water to make the process easier. When I took press-on nails off there was little to no residue left on my natural nails. The rest of the glue can be removed with nail polish remover.
My Experience With Glamermaid Press-on Nails
My first choice fell on the 'Ignore You' set, which is a medium-length square nail with a glossy, black and white design inspired by the No-Face or Kaonashi character from the animated fantasy Spirited Away. The set is gorgeous and the design is so neat! To my eye, it looks a bit more wearable than long coffin nails, so I decided to test my application skills on it.
I must admit that technologies made impressive progress, and the adhesive stickers used to apply Glamermaid press-on nails are much more convenient than nail glue. With nail glue, the whole process of application turns messy, and it usually dries longer and lasts just for a few days. It might take you some time to find the right adhesives and apply them onto each press-on nail individually, but the final results are worth the fuss.
If you look closely, you'll see that the design on every nail differs in placement. This feature makes the press-on nails look more realistic as if the design was made by the nail artist with the stamping technique. The edges of the nails are smooth and even, but if you see any minor imperfection, you can simply buff it off with the buffer that comes in the set.
So, once I applied my black and white set of nails, I pressed them on for 15 seconds, and it was done! At first, they feel a little bit stiff on top of your natural nails. But, after 30 minutes you stop feeling them at all. When I woke up the next day, I forgot these were not my natural nails.
However, I could still see some of my natural nails. They were peeking out from underneath press-on nails. My nails are pretty wide and press-on nails couldn't completely 'conceal' them. To be honest, I don't mind this, just like I don't mind some 'visibility' around the cuticle.
- How to Remove Press-on Nails?
Removing them off was a bit of a struggle, as they stick onto the nail so well. It wasn't painful or damaging, just slightly uncomfortable. My natural nails looked perfectly preserved. They were a little bit dehydrated from the wipe, but there is nothing a drop of nail oil can't fix!
Wondering how long do Glamermaid nails last? My nails lasted for 4 days after I took them off. But, not because they were not holding well on my nails. I needed to do some gardening and had to take them off for the sake of my comfort. I surely plan to go back to press-on nails. I chose between the 'Rainbow Doodle' and the 'Flashlight Bat' sets. The 'Bloody Skull' with its gorgeous design I plan to wear on Halloween.
Final Verdict
As I have mentioned above, the last time I used press-on nails was many years ago. I wasn't expecting too much from them this time, but I was wrong. The adhesive stickers take wearing and applying press-on nails to the next level. They felt weightless and looked incredibly neat and glamorous at-home manicure. If you need a fast and easy solution to a tricky manicure puzzle, these pre-on nails will become one.
The easy application system is a huge advantage without any doubt, but my favorite thing about Glamermaid Nails is the fabulous range of cool designs. If you like to scroll through your Instagram or Pinterest feed and favorite go-to designs, you can be sure to find similar nail looks at the Glamermaid store. So the final verdict – I love, love, love them!
Lots of love,
Liz
Liz


