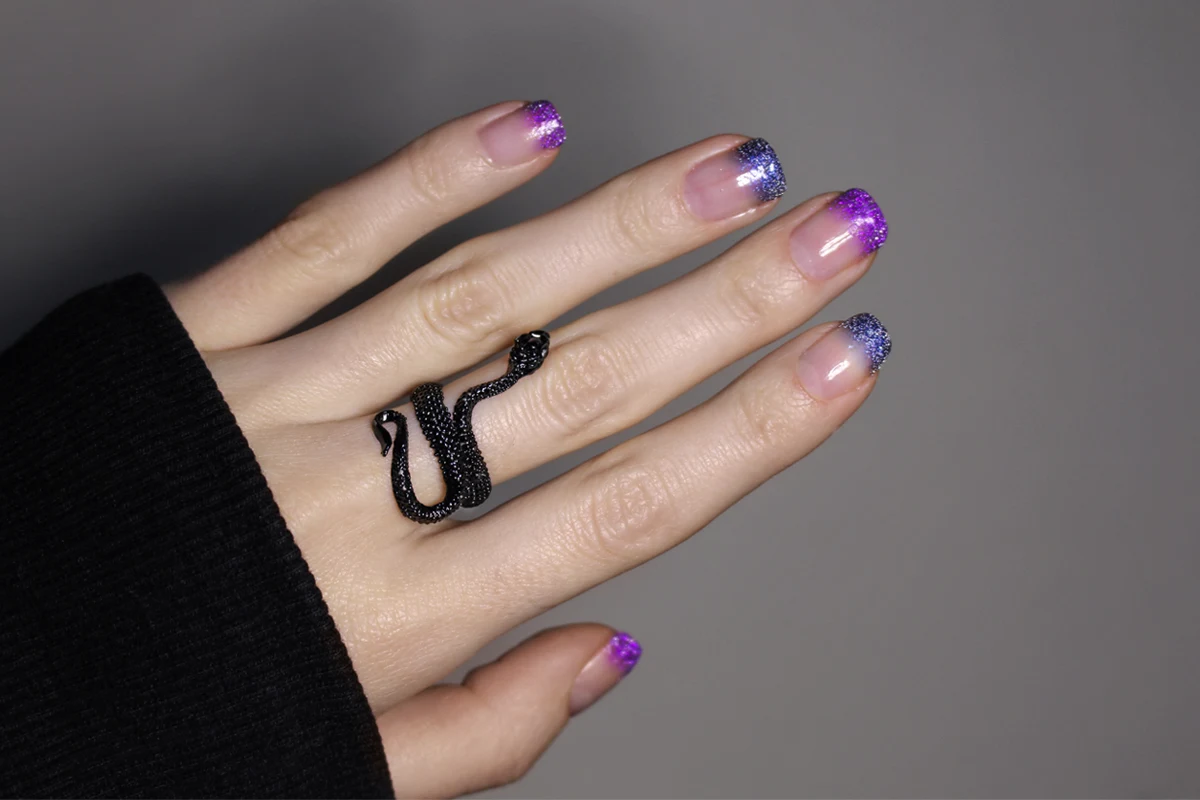
The glitter nail look is one of the most popular and most eye-catching manicures ever. Under this charming look is hidden the simplicity of nail polish application and longevity of wear. Not a bad idea for a nail polish lover, isn't it? A glittery manicure can last up to a week or two of constant wear with minimum to no chipping. Moreover, thanks to the chunkiness of glitter, this look protects the surface of the nail and helps them to grow longer and healthier. Well, now it sounds super exciting! What if there was an effortless way to apply glitter manicures on the nails and make them last even longer without touch-ups.
How to Get a Low-Key Glitter Nail Look?
After my versatile nail look for every day, I started trying this nail polish application with every other nail I got in my collection. Of course, some of them work like a charm, while others are not as subtle at application with a sponge. But, this technique allows a smooth, ombré-like application with almost any type of nail polish there is on the market. Glittery nail polishes, especially the ones with chunky glitter to them, also let you use the sponge technique with them. However, they might be not as smooth-looking, as normal nail polish.
How to Make the Ombré Transition Smoother?
There is a way to make the glitter nail polish look as smooth as possible while creating an ombré nail look. For this easy nail look, I used Reflective Glitter nail polish by Born Pretty*. These are the shiniest, blinding nail polishes I ever had! The regular-sized holographic glitter catches the light most beautifully, creating an appealing sugary reflection on the surface of the nails. It is available in eight various shades: from pale, cool, and warm-based silvers to dark navy, red, and purple. The colors are very beautiful and bright, on a bright sun, they almost look neon.
- Dab with a sponge:
To make the ombré as smooth as it is possible, I suggest you pre-apply similarly-colored nail polish, before applying glitter. Use the same sponge applicator to dab the color onto the tips of your nails. Move fast, applying the color in fine layers. The idea is to create a very subtle transition between the color and the natural nail.
- Add some sparkly polish:
Once the tips are covered, they are ready to receive a portion of sparkly glitter on top of them. Again, you'll need the help of a sponge to dab the trendy glitter nail polish on top of the nails. This step is the hardest, and you'll maybe need to practice a bit, before receiving the perfect results.
Apply glitter nail polish in fine layers, allowing each layer to dry, before moving on to the next one. In the end, seal the nail look with a clear top coat. It will smooth any imperfection and 'reveal' the sparkles.
The Longevity of This Nail Look is Superb!
The advantage of such a nail look is pretty obvious: it is versatile, very simple, and, most importantly, it is long-lasting. Chunky glitter creates a thick layer on the tips of your nails and protects the most fragile part from breaking. Another super-important pro – no touch-ups or redoing your manicure. While your natural nails will slowly grow from the root, the tips of your nails are safely sealed under the layers of glitter. As you can see, there is absolutely no need to redo your nails, unless you really want to try something new.
Final Thoughts...
Whether you prefer your nails to look long, or always opt for shorter claws, this low-key glitter nail look is something worth trying. You can vary the size of the glitter, its color, and reflectability, but you can't take away the versatility of such a nail look. Of course, for the day-to-day wear, I would recommend you rock something less striking.
Maybe fine pearlescent shimmer based on nude nail polish? But for special occasions or alternative looks, the chunky glitter is what our nails want and need!
Lots of love,
Liz


